Showing posts with label mom. Show all posts

Parker's Room

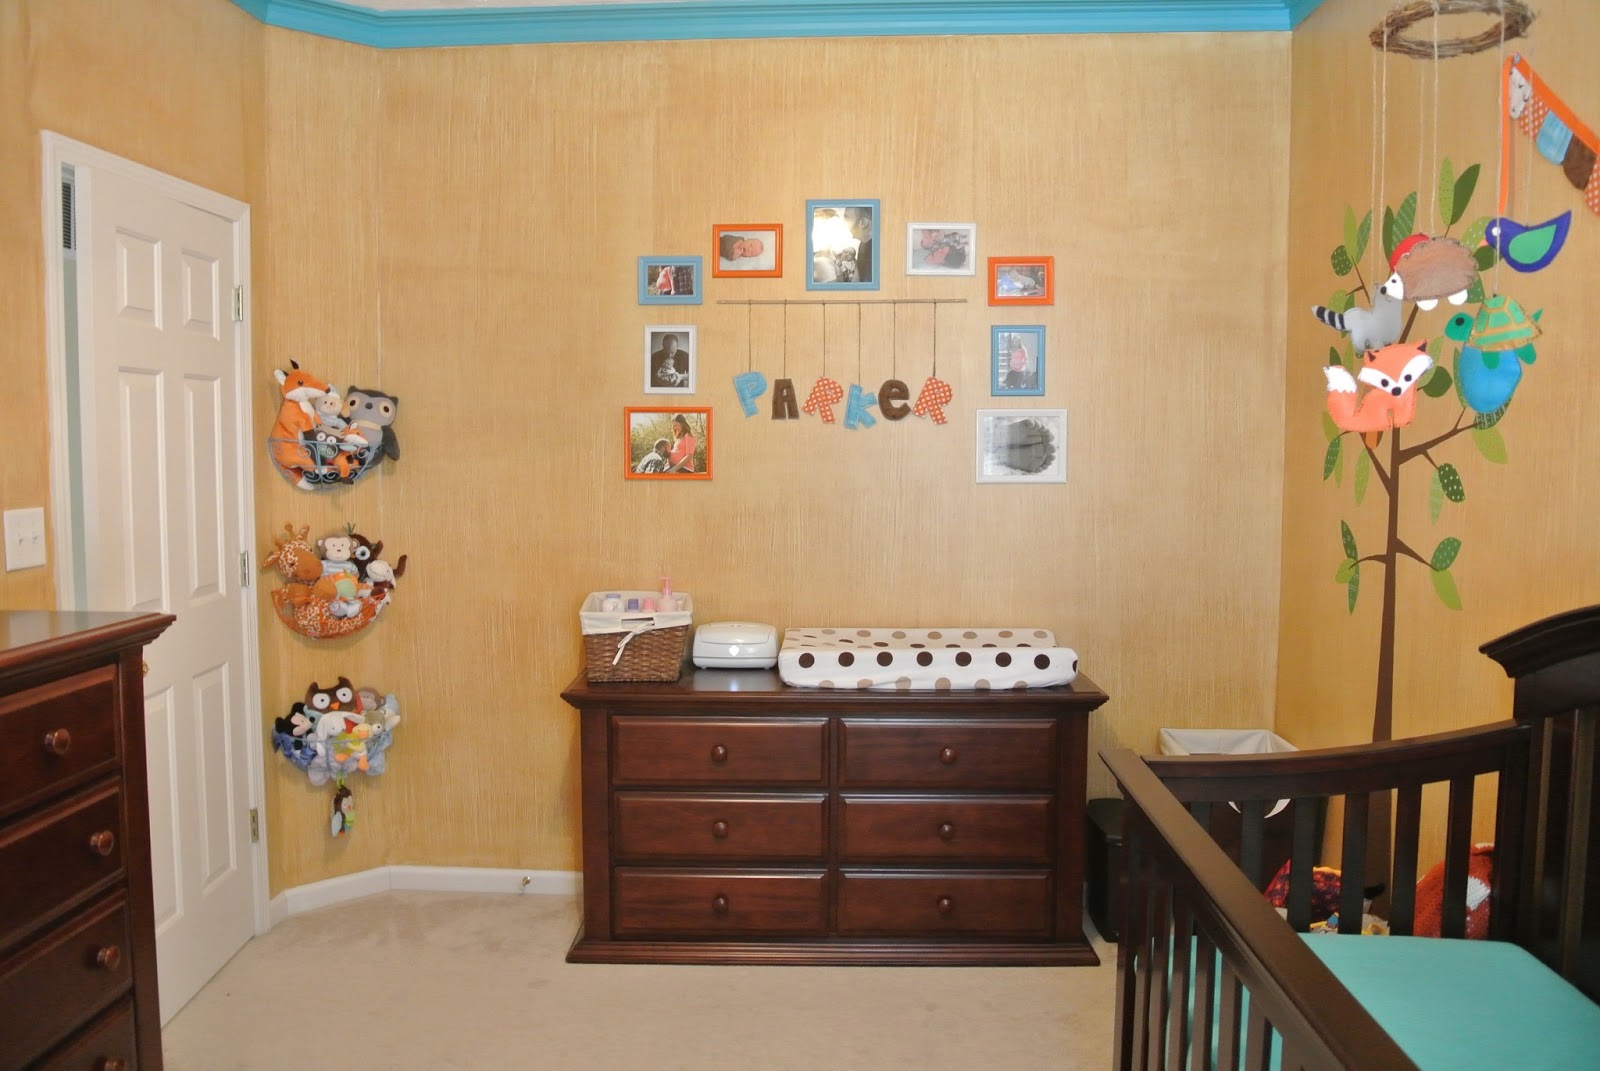
With my mom coming out to meet baby Parker, we were able to put some finishing touches on Parker's room. I absolutely LOVE his room now...I personally think it's freakin' adorable!

Rocking Chair courtesy of dad and stepmom

bookshelves made by Clint - books given by lots of people!


mobile - felt animals made by mom


tree hand painted by mom

hand painted tree and raccoon and fox decals


dollar store frames spray painted...stay tuned for a post with newborn pics!

puffy letters handmade by mom


ultrasound pics
What do you think?? I love it!!

Baby Room Update

Deciding what to do in the baby's room was a tough decision. There were several ideas I had and it was hard to pick one. I had it narrowed down to an owl/fox/orange/turquoise theme and a Harry Potter theme :) I decided to go with the first. Maybe our little boy will end up loving Harry Potter as much as me and will want that later on!

I saw this cute room on Pinterest (of course) and really liked the turquoise molding! I also really liked the walls...either they are wallpaper or textured. My mom searched how to create this look using paint because wallpapering is not happening!

First we painted the walls antique white to get rid of the funky tan (that every room in the house was painted with when we moved in). Then we bought a quart of a lighter brown and mixed it with glaze. Mom rolled on the glaze and then I used a wallpaper brush and brushed it up and down several times. 

I had several "special" techniques!
Here's a close up of a wall. This is a pretty close match of the actual color.
 Here are several shots of what the room looks like now. I used the filtering site I mentioned previously to edit the photos. 


This was super easy to make and it really adds some orange!


We made these curtains out of a flannel fabric. It's hard to tell but there are turquoise birds. They really show up well because of the molding. I think I may go buy more of this fabric and make some sheets!


This was another project my mom worked on. It is the cutest pillow!

There are a few different prints that I have seen and want to frame to add some more excitement and color. I also have a few shelving options that we might add as well. Then of course we have to have the room actually ready for the baby! We need a chair, mattress, changing pad, and lots of other things! Good thing we still have about 14 weeks!

Craft City

For the Christmas holiday my mom came to Indy for 2 weeks and stayed with Clint and I. I had previously mentioned working on the baby room while she was here. So the first day she was here (Thursday) we started looking at ideas. We took a break Friday to prepare for our Gender Reveal Party and mom and Dale helped us with several things around the house (finishing the bathroom and hanging things on the wall - which I blogged about here). After the party we got to work on the baby room and a few other projects. I am going to share the baby room in a separate post so watch for that!

Project #1: The very first project she helped with was fixing my computer! It has pretty much been dead since my birthday in October. She completely rebooted it and installed Windows 8 on it. I'm not a big fan of it but she made it work like the old Windows so its fine now. I now have Adobe Photoshop back in my grips! Quick sidenote - I just discovered Pixl-o-matic. It's like Instagram but for your computer. You can do all sorts of quick filtering with your pictures. I tried out a bunch so brace yourself :)

Project #2: I found a cute picture on Pinterest that displayed your last name and the year you were married. We found a fancy font to write it in and then my mom taught me how to print the image using Posteriza. She then traced the image on the back with a pencil. We taped the poster to the wall where we wanted it and I traced the image on the front of the poster, transferring the pencil on to the wall. She then painted the image. 

Awesomesauce
Project #3: A couple months ago we decided that we wanted to put up crown molding in our bedroom. Clint started it one evening. Well he realized that he wasn't going to finish it that night like he thought - he was tired and crown molding is really tough to put up because of the angles. So it sat unfinished for a while. Mom is really good at caulking so she told Clint that messy angles weren't that big of a deal! So Dale and Clint finished it one night and mom spiffed it up nicely!

Looking good! Mom also helped hang these canvases up too! (Not that they were hard.)
Project #4: This project was a bonus! Mom forgot what time they were supposed to leave on Wednesday and they accidentally missed their flight. They couldn't get another flight until the next morning. So we decided to tackle one more project! I found this really cute bag on Pinterest and wanted to make one!

We set out to JoAnn Fabrics to find similar fabric. We picked an orange fabric that we actually used in the baby room because I like it so much! We searched everywhere for something blue and white but no such luck. I was really holding out for the stripes! So we headed to Hobby Lobby to see what they had. We found a blue and white fabric but it was just too busy for me! We found a gray and white chevron fabric that I really liked but just wasn't sure if I liked it enough. After debating forever and thinking about just waiting and looking some more, I decided to get the gray. We were now working on a time crunch! I was going line dancing that night and I knew Mom and Dale were leaving the next morning and wanted to get to bed early. We hurried through it but it turned out great! I did all the sewing except for one part. Mom did all the directing but I am getting so much better at sewing! Here is the finished product:


The outside has a pocket (it sort of blends in with the pattern) and it has ties on the end to tighten it up. The inside has 3 pockets - 2 horizontal rectangles and one long rectangle (for bottles and such). Isn't it fabulous!?!

Project #5 - This project is still ongoing. Mom taught me how to crochet and we started working on a gray and white chevron blanket (much like the bag!). There isn't much to share yet but I'll keep you updated on the progress!

Now stay tuned for the baby room! Here is a sneak peek of the banner we made!


House Update

Having the gender reveal party really put me into the decorating spirit this year. Clint has always wanted more Christmas decorations but I usually don't feel like getting too much out. It's a lot of effort putting it out and even more putting it away! I made it a little easier by spreading it out over a few random days here and there. Hopefully something will put away nicely so I can reuse them next year easily.


Mistletoe!

I really like the Merry Christmas garland I got from Target this year! Took forever to figure out where to put it!

Our stockings and Zoe :)


Our tree before any presents were underneath.
With my mom and stepdad in town, we had extra people helping get things ready (mostly for the party Saturday) but we got more things done that had been on our list. Dale helped hang the three frames I bought for our pictures from October. He also hung the butterfly mosaic I made in the bathroom as well as the new towel bar. Mom and Dale both helped Clint with the new shelf he installed in place of the ugly medicine cabinet that was in the wall. Clint got all the painting done too! The bathroom looks great now! 


We also started getting the baby's room cleared out. Here is the furniture too!


 Our house is finally looking more like our home!

Spoiled!

I have not felt this spoiled in quite a while! I got home today to find another package at the front door! My mom whipped up another three things for me! Well, actually for our family. She sewed two baby bags:

This one is definitely my style! Corduroy and funky patterns!
This one is more meant for Clint.
Both have lots of pockets and room. I'm not sure if Clint will carry the one she made for him but I know it will definitely be used. I think Clint is more into the backpack-as-a-diaper-bag-thing. 

Then she also made this cute blanket:

The puppies are meant to look like Zoe if you didn't catch that. It is nice and thick so it can definitely be used as a floor-type blanket. 

Isn't my mom just faboo!?! Here's her blog again if you want to peruse her craftiness (house things, sewing, and more).

Now I'm off to get my sewing skills sharpened...I am going to make a dress! Updates will follow later (as long as it works out!).

My Mom is Awesome

My mom is pretty awesome. She sent me a package the other day and the items were all handmade gifts! Double bonus!! I love getting packages in the mail and anything my mom makes is cool. If you didn't see my owl purse in person or even just the post (below) then let me tell you that I really like cute owl things.

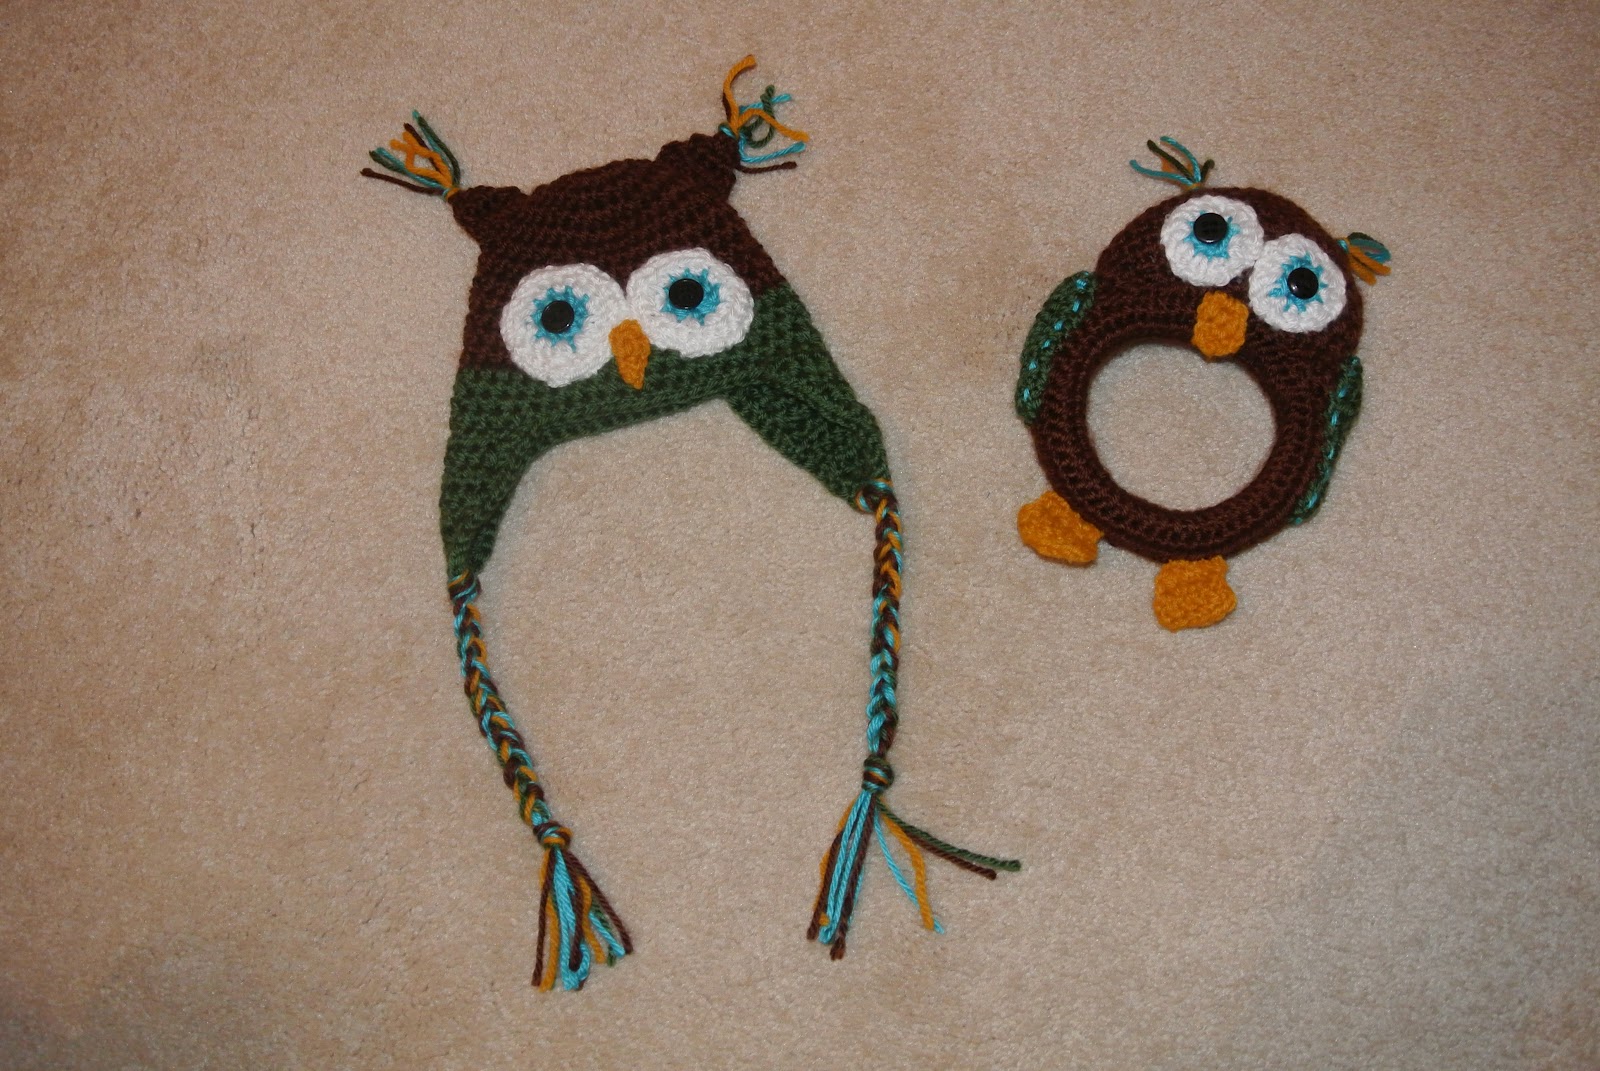
hat and rattle

baby blanket

close-up of the owl on the blanket

 We don't have a theme or anything decided for the baby's room yet but these things are just too cute! Be sure to check out my mom's blog Tough Kittie Puffs!

Owl Purse!

So I have had a love for owls and all things owl for quite a while. When I was in California last year I saw some cute owl purses. However, some loony bin decided to sell them for around $80. Please. So I showed my mom some designs for purses that I liked and she picked out some fabrics and was going to make one. Well, mom decided to go buy a fixer-upper house and has been super busy for a while now. Check out her awesomeness here.

Fast forward to now. I am in California visiting said awesome mom and we decided to take a break from beach bumming and visiting Disneyland to have a sewing day.  So we decided to make my owl bag! Note: when I say 'we' it mostly means mom. Mom did all the sewing; I cut and ironed. :) We found one that we liked for inspiration:


Here are some of the fabrics that mom bought and a few others she had extra:


First mom drew a paper pattern in the shape of an owl. Then she drew a wing for each side. She also drew the outer eye and a nose.

We started with a piece of paper 11 inches wide and 12 inches tall. The bottom edges are rounded and the top has an inverted arch.


The outer eye is a circle with a 2 and a half inch diameter. The wing is 8 inches tall by 4 and a quarter inches wide. The opposite points are rounded to match the curved body pattern.


We chose a dark red corduroy fabric as the body background. She traced the body onto the fabric but cut a little extra to allow for a seam allowance.

Here is the front of the purse.

We traced the wing pattern onto this fun fabric!

Mom sewed the wings onto each side of the body with a satin zigzag stitch.
 For the back, we decided to create a layer of feathers! The top half is made out of the red corduroy.  The bottom half, which will be covered with feathers, is the same fabric as the wings. 

There is about 4 inches of corduroy at the top, which leaves about 8 inches of patterned fabric for the bottom.
We cut a beak that is an inch wide and an inch and a half long (isosceles triangle!). We cut the eyes out of the same fabric as the beak. Then we cut another circle for the next layer on the eyes, which is an inch and three quarters. We picked a lighter, more solid color so the eyes weren't so dark. Then we found some cute brown buttons for the eyes!


Ready to be sewn!
Eye fabric sewn with a zigzag stitch.
 Now for the lining! We chose this fabric because the print contrasts with the outside colors well!

This was cut with the same pattern as the outside.

An inside pocket for keys or a phone!

Pocket is 4 1/2 inches wide and 3 1/2 inches tall.
Special design! A chapstick pocket! 3 inches tall, 2 inches wide.
 After sewing the pockets on, we sewed the lining together, leaving a 6 inch gap on the right side. This gap will be used to flip the purse inside out later, when all the layers are sewn together. 

Now onto the easy task of making the feathers! 

We cut 50 feathers that are 2 1/2 by 4 inches, with a rounded bottom.

We sewed two feathers together, making a total of 25 feathers. We flipped them inside out and ironed them flat so they were ready to sew on the backside of the purse.

To make the fabric meet the top of the wings on the front, we added a finished strip of one and a quarter inches to go above the feathers.
Mom sewed each row of feathers, starting with the top row. Then she pinned each row up and sewed the next.

To make this purse a slingback, we made a strap that was 45 inches long. It is 1 3/4 inches wide. We put the red corduroy on the top and the brown fabric from the lining on the bottom side.
Finished backside!

We used some thick green fleece to put between the lining and the outside layers so that the purse wouldn't be so flimsy. The purse will hold it's shape better with something thick in between. We again used the same pattern to measure.


Here is mom pinning the strap, outside layers sewn to the fleece, and the lining all together so it can be sewn!

Lots of layers to sew!

The purse was flipped right side out, and the 6 inch gap is now sewn shut!
View of the inside with chapstick in place!


 It took about 3 hours from start to finish to complete.


 The finished deal!!